Are you dreaming of adding festive, eco-friendly decorations to your outdoor space this holiday season? Plywood Christmas decorations, especially DIY plywood Christmas trees, offer an ideal blend of charm, sustainability, and cost-efficiency. In this comprehensive guide, we’ll explore how to make chic plywood Christmas trees, the materials needed, step-by-step instructions, and tips for finishing touches. Additionally, we’ll highlight the pros and cons of plywood for outdoor use and link to other relevant projects to help you maximize the beauty and longevity of your holiday decor.

Why Choose Plywood Christmas Decorations?
Plywood’s versatility, durability, and affordability make it a favorite material for DIY Christmas projects. Its smooth surface is perfect for painting, staining, or even stenciling, and you can easily shape it into various holiday-themed cutouts. Furthermore, plywood’s durability makes it well-suited for outdoor displays when properly sealed, ensuring your decorations withstand winter weather.
Materials Needed for Plywood Christmas Trees

To bring your plywood Christmas tree project to life, start by gathering these materials:
- Plywood Sheets: Two 4×8 sheets for multiple tree sizes
- Circular Saw: For cutting tree shapes
- Sandpaper: To smooth rough edges
- Painter’s Tape and Paint Roller: For clean, professional paint lines
- Green Exterior Paint: For the tree
- Brown Exterior Paint (optional): For the tree base
- Clear Sealant: To protect paint from the elements
- Drywall Screws (1⅝ inch): For assembly
- Drill/Driver: For screwing pieces together
- Optional: Cardboard for tracing patterns, holiday lights, and decorative items
Step-by-Step Guide to Creating Plywood Christmas Trees
1. Cutting the Plywood
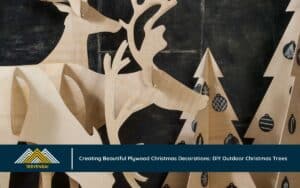
Begin by marking the shapes on each sheet of plywood for different-sized trees. Here’s a quick breakdown:
- Large Tree: Find the plywood’s center about 2 feet up from the bottom. Draw lines from this point to each bottom corner.
- Medium Tree: Draw the top at about 6 feet high, mark the center at 2 feet from the bottom, then connect the center to each bottom corner.
- Small Tree: Use the remaining 2′ x 4′ section. Mark the center 1 foot from the bottom, then draw lines to the corners.
With your shapes sketched, use a circular saw to carefully cut along the lines.
2. Sanding and Shaping
After cutting, sand the plywood edges to remove splinters and rough areas. This step not only improves safety but also enhances the finish when painted or stained.
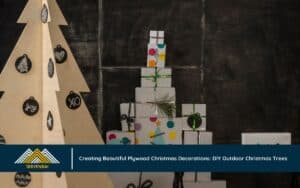
3. Painting the Plywood Trees
- Trace and Tape: Trace tree edges using cardboard to ensure clean, straight lines, then apply painter’s tape along these lines.
- Paint the Base Coat: Using a roller, paint the inside area green, mimicking a natural pine tree color. After the first coat dries, apply a second layer for a rich, durable finish.
- Optional Base Color: If you want a contrasting base, paint it brown. This small detail adds realism and a polished look.
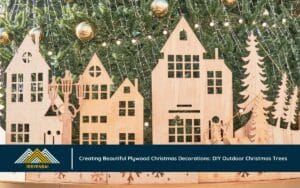
4. Assembling the Tree
- Place the cut and painted plywood pieces together in the tree shape.
- Securely fasten the pieces with 1⅝ inch drywall screws, spacing them evenly to hold the structure firm.
Tips for Perfect Finishing Touches
Applying a clear sealant helps protect your trees from moisture and extends the life of the paint. Consider these finishing touches to make your plywood Christmas trees truly shine:
- Add Lights and Ornaments: Outdoor-safe string lights, colorful ornaments, and even faux pine branches can enhance the trees’ appearance.
- Stability Additions: If your outdoor area experiences strong winds, bury the tree base slightly in the ground or use a wooden stand for extra support.
Pros and Cons of Plywood for Outdoor Christmas Decorations
While plywood is a practical choice for DIY outdoor decorations, it’s essential to consider both its benefits and limitations:
Pros
- Cost-Effective: Plywood is budget-friendly, allowing you to create large-scale decorations without breaking the bank.
- Versatile and Customizable: Plywood offers a wide variety of options for painting, staining, and even shaping.
- Eco-Friendly: Plywood can be sourced sustainably, making it an eco-conscious choice when sealed with non-toxic finishes.
Cons
- Durability: While treated plywood can endure weather exposure, it may require maintenance over time, especially if subjected to extreme weather.
- Potential Warping: Without a good sealant, plywood can absorb moisture, leading to warping or cracks. Using high-quality exterior-grade plywood can mitigate this issue.
- Weight: Plywood can be heavier than alternative materials, which may be a consideration if you plan to store or move the decorations frequently.
Other Creative Plywood Christmas Decoration Ideas
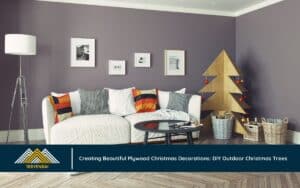
If you’re excited to go beyond trees, plywood offers endless possibilities for Christmas decorations:
- Plywood Santa Sleighs: These can be painted red and gold for a traditional look or customized with intricate patterns for a unique take.
- Holiday Cutouts: Snowflakes, stars, reindeer, or even a nativity scene cut from plywood can add a festive touch to your yard or front porch.
- Festive Wreaths: Using bendable plywood, create wreath bases that can be decorated with faux foliage, ribbons, and holiday bells.
Conclusion: Craft Your Own Plywood Christmas Wonderland
DIY plywood Christmas decorations provide a sustainable, customizable, and creative way to bring holiday cheer to your home. With proper tools, paint, and imagination, you can transform plain plywood sheets into beautiful, lasting Christmas trees or other festive outdoor displays. These decorations are not only visually striking but also offer a satisfying, hands-on project to celebrate the holiday season.
Whether you’re a seasoned DIY-er or new to the world of plywood projects, creating plywood Christmas trees is a fun, rewarding way to make your holiday decor truly stand out. By following these steps and adding your personal touch, your decorations will become cherished elements of your holiday tradition.
If you’re ready to elevate your home renovation project, don’t hesitate to contact us at 186yenbai. Let us help you choose the right high-quality plywood that meets your needs and transforms your home into a beautiful and functional space.
Phone: +84 93 3930880
Email: support@186yenbai.com
Facebook: https://www.facebook.com
Address: FACTORY : Hop Nhat Villag,Thinh Hung Commune. Yen Binh,
Yen Bai Province, Vietnam
HANOI OFFICE : 32 Dai Tu Street, Dai Kim Ward Hoang Mai District,
Hanoi,Vietnam
Check out our other articles below:
Why High-Quality Plywood is the Ultimate Choice for Global Markets
High-Quality Plywood vs. Low-Quality Plywood: What’s the Difference?