
Installing a plywood subfloor is a crucial step in any flooring project, providing a stable foundation for your final flooring material. Whether you are renovating an old home, building from scratch, or simply replacing a worn-out subfloor, understanding the process is essential for achieving long-lasting results. This guide will walk you through the necessary steps, tips, and considerations to ensure your plywood subfloor is installed correctly and efficiently.

Table of Contents
ToggleWhy Choose a Plywood Subfloor?
Plywood is a popular choice for subflooring due to its durability, moisture resistance, and ease of installation. Here are a few key benefits of using plywood as your subfloor material:
- Strength and Stability: Plywood is made from thin layers of wood veneer glued together, providing superior strength and stability compared to traditional particle board or OSB (oriented strand board).
- Moisture Resistance: Many plywood options are treated to resist moisture, making them suitable for various environments, including basements and kitchens.
- Compatibility: Plywood subfloors can support a wide range of flooring materials, from hardwood to tile, making them versatile for any project.
Tools and Materials Needed
Before starting your project, gather the following tools and materials:
Tools:
- Circular saw or table saw
- Measuring tape
- Level
- Hammer or pneumatic nail gun
- Caulk gun
- Chalk line
- Sledgehammer and tapping block
- Safety goggles and ear protection
Materials:
- 3/4-inch plywood sheets (or other specified thickness)
- Construction adhesive (e.g., Liquid Nails for Subfloors)
- Subfloor nails or screws (2-inch recommended)
- Additional materials based on your specific installation requirements (e.g., rim joists, blocking)
Step-by-Step Installation Process
1. Preparation of the Area
Before installing the plywood subfloor, ensure that the area is clean and dry. Remove any debris or old flooring material and check for signs of moisture damage or structural issues. If you are working with a new build, ensure that the foundation is level and square, as this will significantly impact the installation process.
2. Joist Installation and Spacing
The first step in the installation process involves properly positioning the floor joists. For optimal results, follow these guidelines:
- Spacing: Joists should be spaced 16 inches on center for a standard 3/4-inch plywood subfloor. This spacing ensures even support and prevents sagging.
- Installation: If you are using engineered wood I-joists, ensure they are installed vertically and supported with a rim joist for added stability. Proper alignment is crucial for a successful installation.
3. Dry-Setting the Plywood
Before permanently securing the plywood, it’s essential to dry-set the first piece:
- Measurement: Start at the edge of the house, positioning the first sheet of plywood so that it overlaps the joists evenly. Each sheet should end halfway across a joist to ensure proper support.
- Square the Layout: Use a level and chalk line to ensure that the first sheet is perfectly square. This initial alignment will affect the placement of subsequent sheets.
4. Applying Construction Adhesive
Once the first sheet is positioned correctly, apply construction adhesive across the joists where the plywood will sit. This step helps to reduce movement and squeaking later on:
- Use a Caulk Gun: Apply a continuous bead of adhesive along the joist edges to ensure maximum adhesion.
5. Placing and Securing the Plywood
With the adhesive in place, it’s time to set the plywood:
- Position the Sheet: Lift the plywood into place, aligning it with the joists. Ensure that the tongue of the plywood aligns with the groove of the adjacent sheet for a snug fit.
- Tap into Place: Use a tapping block and sledgehammer to gently tap the plywood into position, ensuring a tight seam with the adjacent sheet.
6. Nailing the Plywood
Once the sheet is securely positioned, it’s time to fasten it to the joists:
- Nail Placement: Use a pneumatic nail gun or hammer to secure the plywood with nails every 8-10 inches along the joists. Remember to leave the last 10 inches from the tongue edge until the adjacent sheet is installed.
7. Cutting the Edges
After all sheets are installed, trim the edges for a clean finish:
- Snap a Chalk Line: Use a chalk line to mark where to cut, ensuring a straight edge.
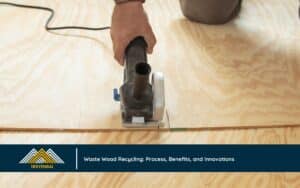
- Circular Saw: Carefully cut the plywood with a circular saw, making sure no one is in the way of falling debris.
8. Weather Protection
If your plywood subfloor will be exposed to the elements before the roof and walls are completed, consider applying a weatherproof sealant or covering it with tarps to prevent moisture damage.
Tips for a Successful Installation
- Plan for Load-Bearing: When choosing your plywood thickness, consider the load-bearing requirements of your final flooring material. For tile, a thicker plywood (3/4 inch) is typically recommended.
- Ensure a Square Foundation: A square foundation is crucial for successful installation. If the house is not square, errors will compound, making it challenging to achieve a straight subfloor.
- Take Your Time: Rushing through the installation can lead to mistakes. Take the time to ensure each piece is installed correctly before moving on to the next.
Conclusion
Installing a plywood subfloor is a significant undertaking that requires careful planning and execution. By following the steps outlined in this guide, you can achieve a strong, durable foundation for your flooring project. Always remember to consult local building codes and consider professional assistance if you encounter any challenges during the installation process. With the right preparation and techniques, your plywood subfloor will serve as a solid base for years to come.
Contact Us for Quality Plywood Solutions
For top-quality plywood solutions tailored to your specific needs, contact 186yenbai today.
- Phone: +84 93 3930880
- Email: support@186yenbai.com
- Facebook: Viet Nam Plywood – 186YenBai
- Address: Hop Nhat Village, Thinh Hung Commune, Yen Binh, Yen Bai Province, Vietnam
Explore our full range of wood and engineered lumber products for your next construction or design project!